Breaking Wave Forces: What Actually Destroys a Seawall
Ask a Galveston homeowner what damages a seawall and most will say storm surge. Surge is the reason waves reach the wall — but the load that cracks a panel or dislodges a cap arrives in a fraction of a second, wave by wave. This is what that impact actually is, and what your contractor is supposed to be designing against.
Why a wall fails on a calm-looking day
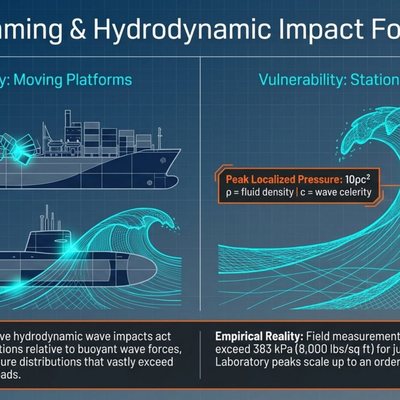
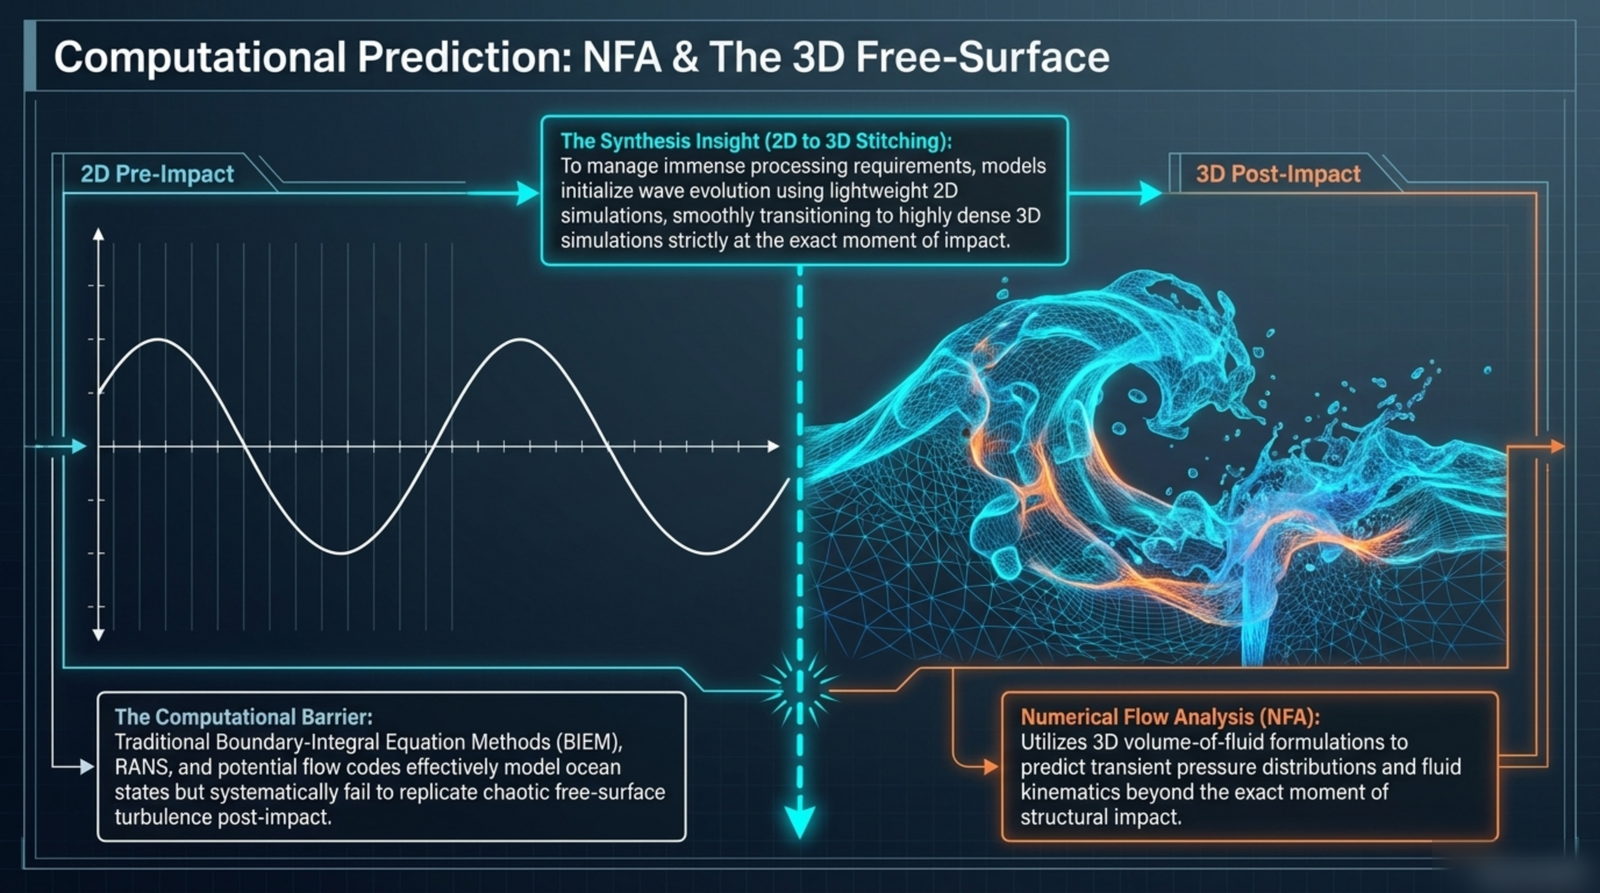
Most seawall failures are reported after a storm, but the damage is usually inflicted in seconds — by individual wave impacts, not by steady water pressure. A wall that looks fine at high tide can be crack-free one season and spalling the next, because the load that matters is a short-duration impulse delivered where the wave meets the structure.
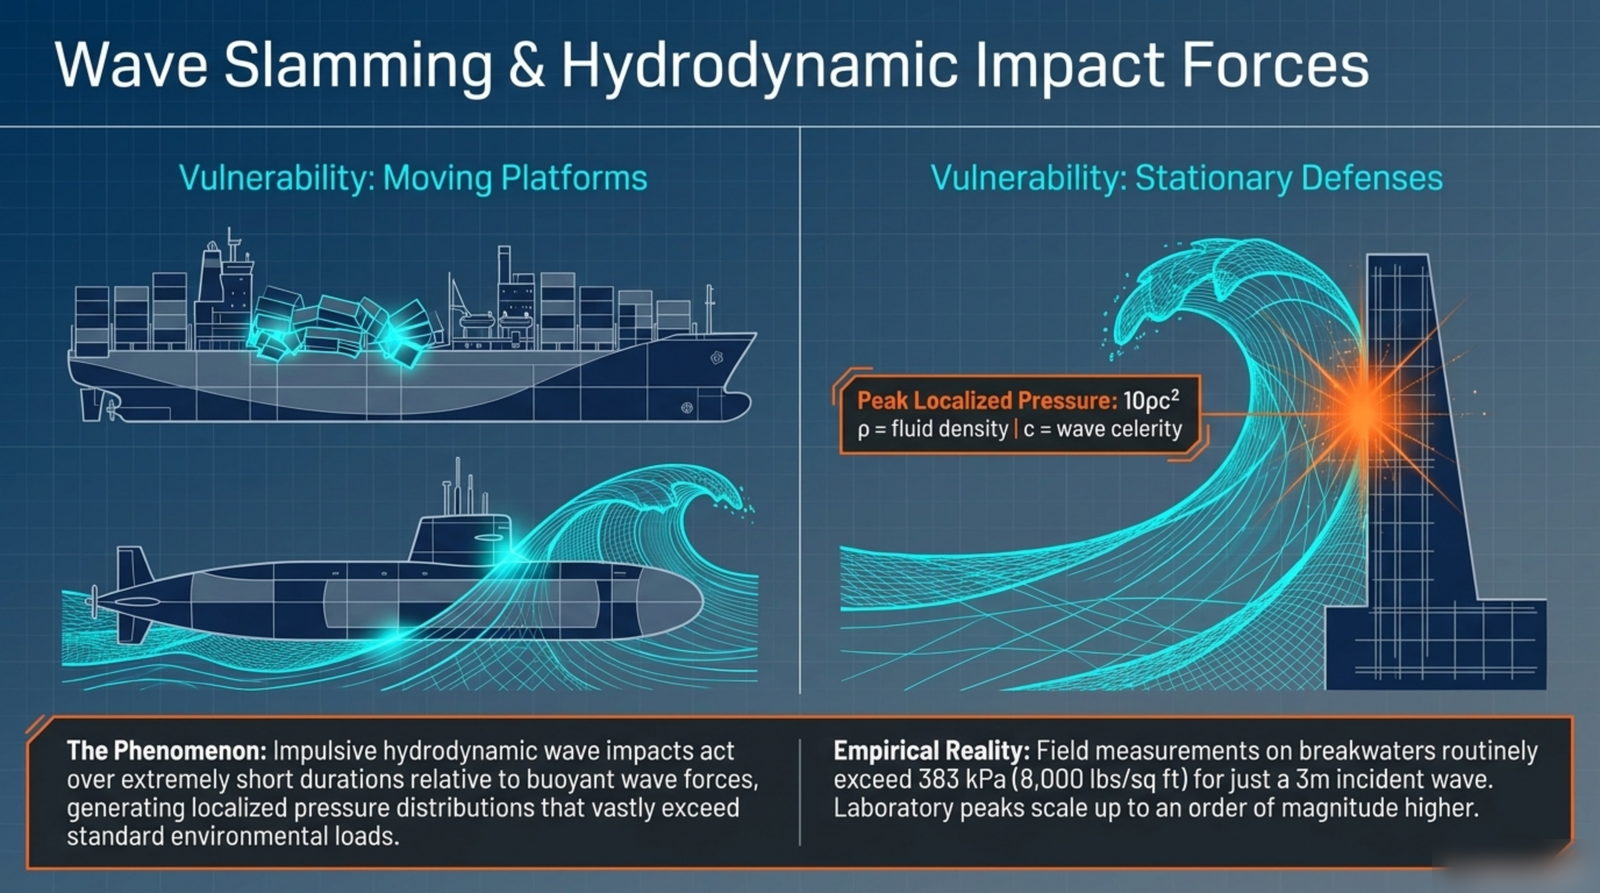
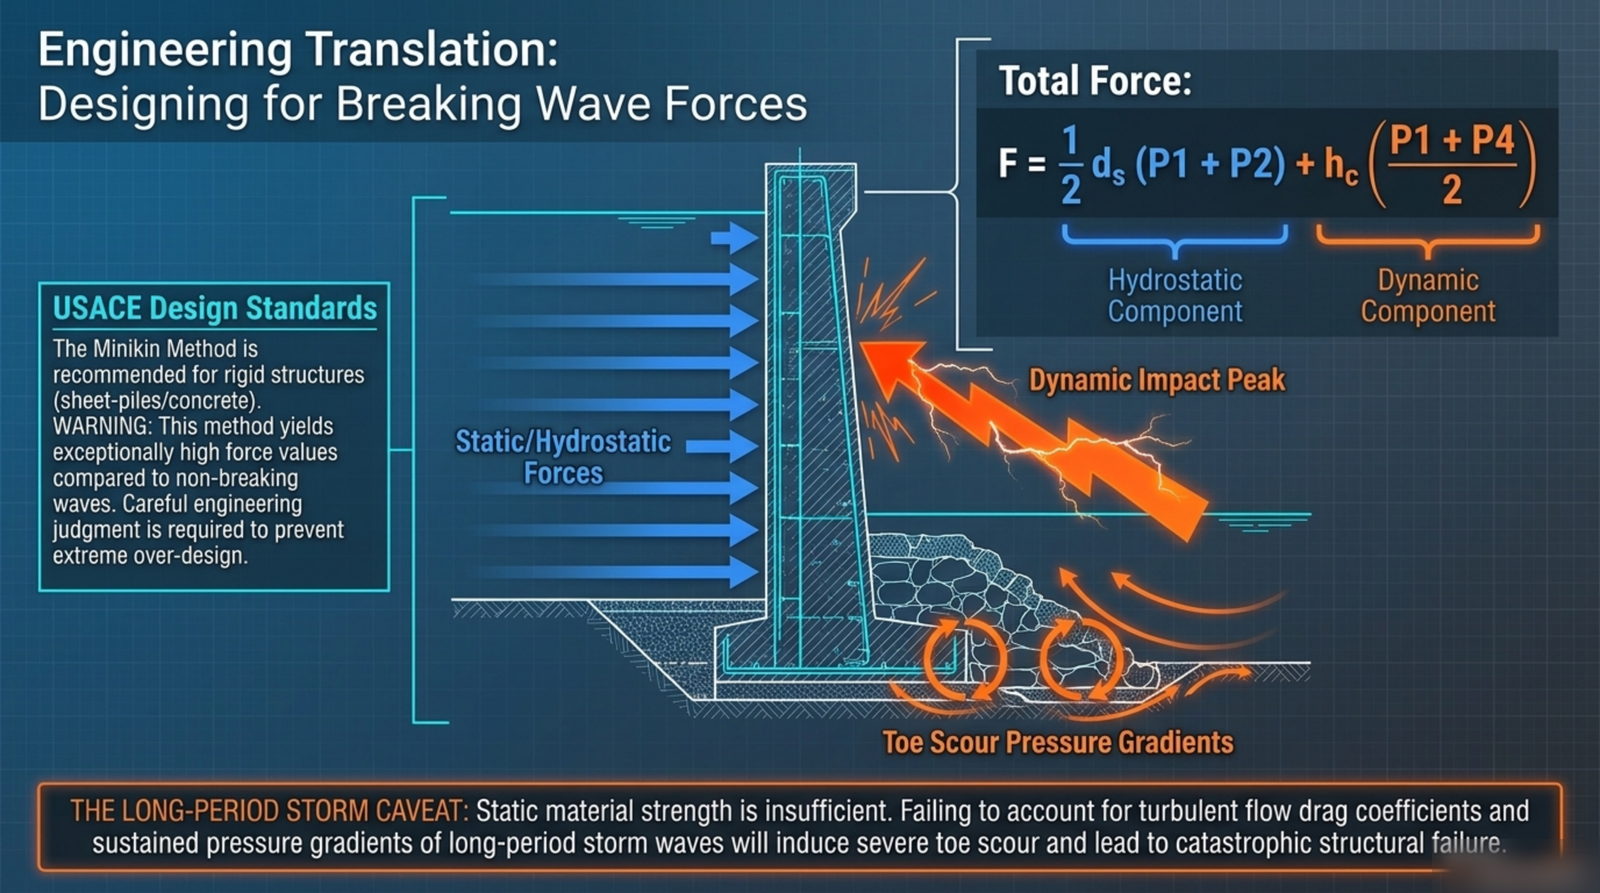
USACE's design manual for coastal revetments, seawalls and bulkheads is explicit: breaking waves on vertical structures exert high, short-duration impulses that act in the region where the wave hits the structure, and the Minikin method it recommends “can yield extremely high wave forces compared to nonbreaking waves” (EM 1110-2-1614, §2-18). That is why your contractor asks for a design wave height rather than an average water depth.
Anatomy of an impact: flip-through, aeration and cavitation
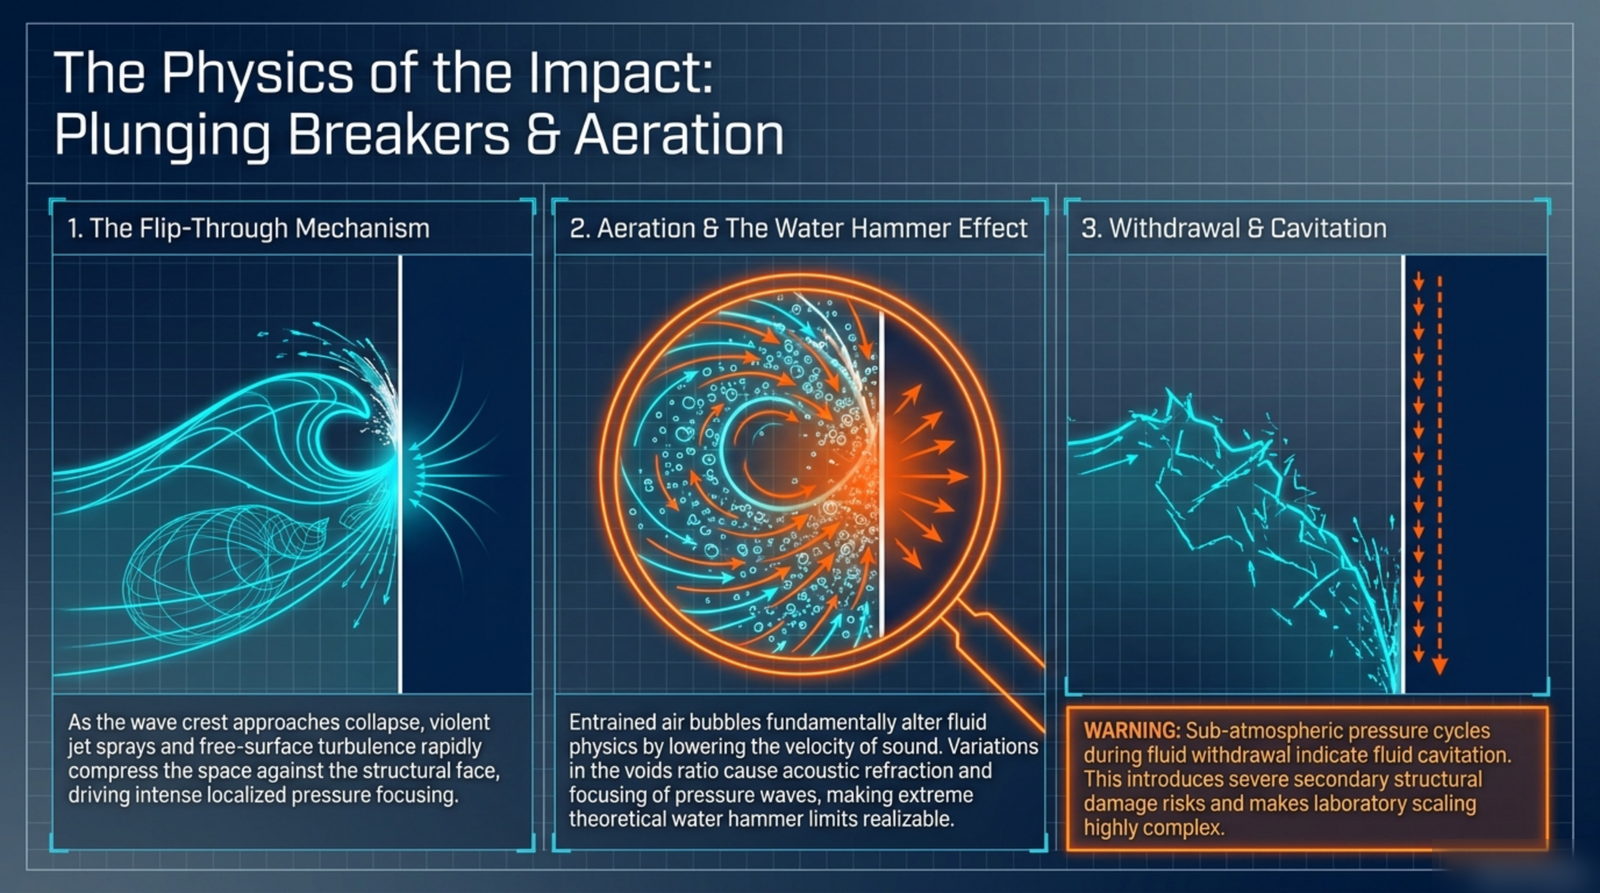
A plunging breaker does not simply push on a wall. As the crest curls, the water surface flips forward and compresses the air pocket between wave and wall — the “flip-through” phase. That compression is what produces the pressure spike, and the entrained air is why the load is so erratic from wave to wave.
After the peak, the water withdraws faster than it arrived. The rapid release can drive the pressure at the wall below atmospheric for an instant — the mirror image of the impact — and repeated cycles of that kind are what fatigue concrete, open panel joints and work fasteners loose. This is the mechanism behind the fine cracking and rust staining you see years before a wall actually moves.
The three variables that decide the load
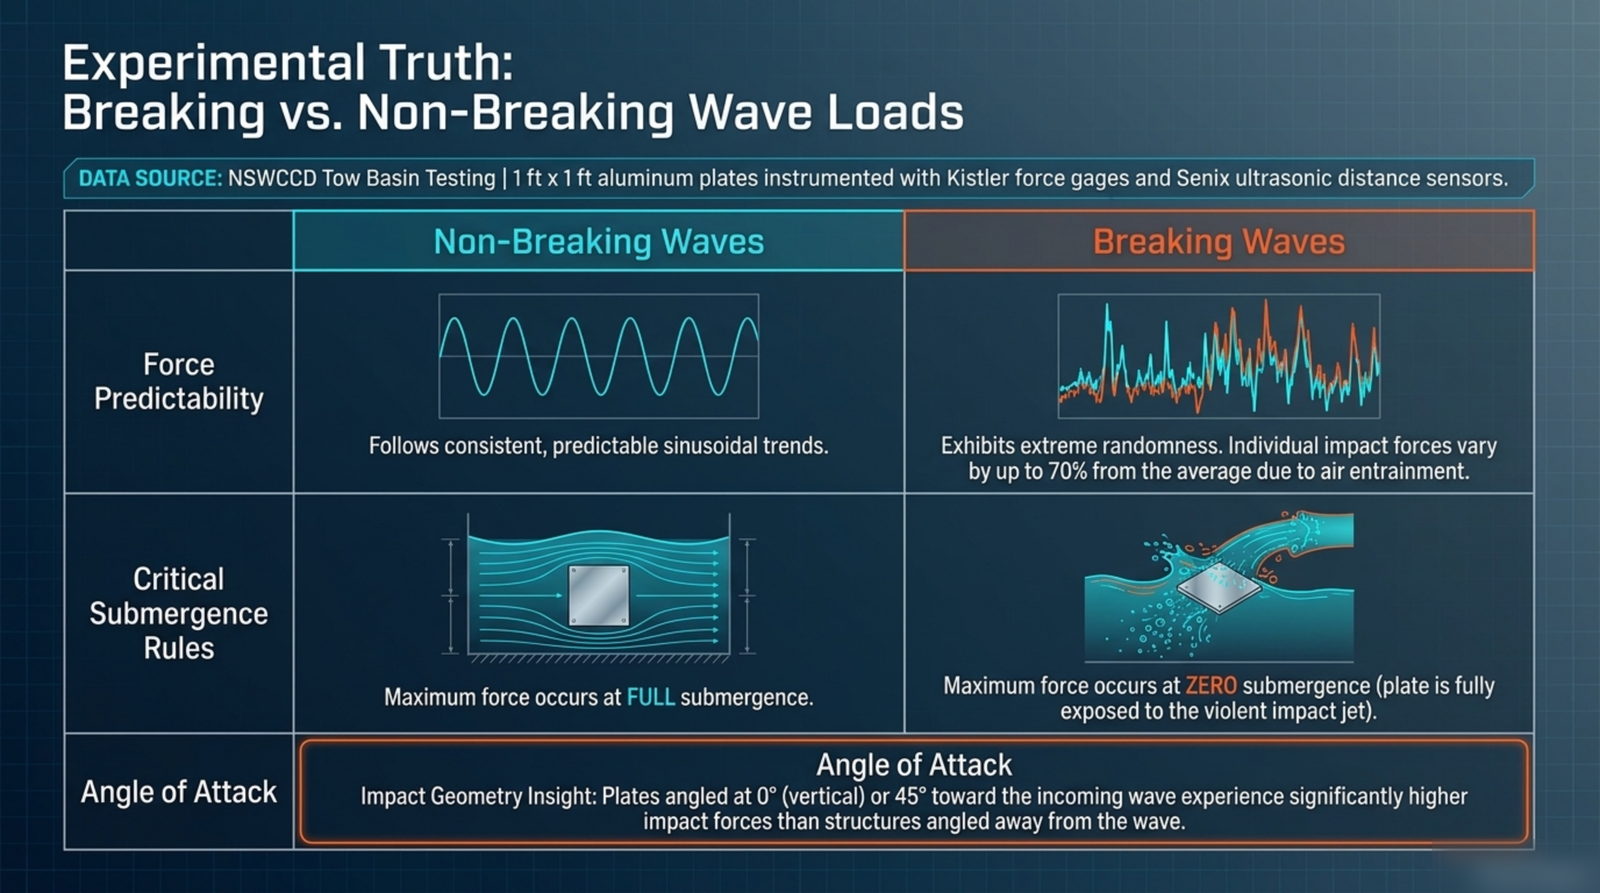
1. How much of the wall is exposed. Water depth at the moment of impact decides whether the wave breaks against the wall or passes over it; that single variable moves the peak force up or down more than any material choice.
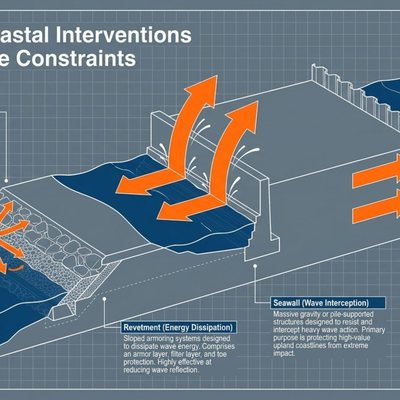
2. The angle the wall presents. A vertical face takes the impulse head-on. A sloped, rough revetment turns the same wave into turbulence and run-up instead. EM 1110-2-1614 devotes a whole table (Table 2-2) to the run-up correction factors for rough slopes precisely because geometry — not thickness alone — is what dissipates energy.
3. Where the toe sits. Impact pressure at the face is only half the story. Wave energy also draws sediment away from the base of the wall.
Toe scour: the slow failure that sets up the fast one
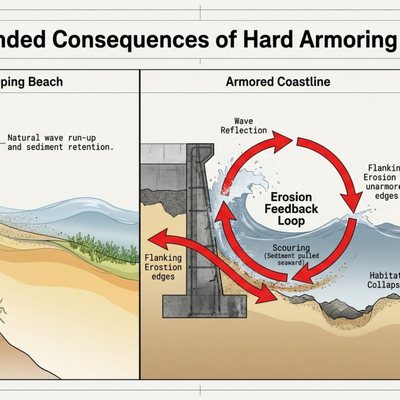
Cantilevered and anchored walls stay upright because a zone of passive earth pressure at the toe resists rotation. USACE states the requirement plainly: for cantilevered and anchored walls, this passive earth pressure zone must be maintained for stability against overturning (EM 1110-2-1614, §2-19). Scour removes that zone grain by grain.
That is why the manual requires toe protection at least twice the incident wave height for sheet-pile walls, and why New York's coastal erosion guidance stresses armouring the toe to prevent undermining: once the base is exposed, the wall's remaining capacity falls quickly and the next storm finishes the job.
What to ask your engineer or contractor
When you get quotes, ask three questions: what design wave height was assumed, how is the toe protected and how wide is that protection, and how is water behind the wall drained? Answers that name numbers and dimensions — not just material brands — are the sign of a proper design.
You can sanity-check the armour sizing yourself with our riprap and armour stone calculator, which uses the Hudson equation and the KD values from Table 2-3 of the same USACE manual. And before spending anything, walk the wall with our inspection checklist — toe scour and drainage are the two items owners most often miss.
Sources
- USACE EM 1110-2-1614, Design of Coastal Revetments, Seawalls, and Bulkheads (30 June 1995)
- NY DEC — Protection Against Wave-based Erosion (revetment design guidance)
Every figure quoted above is traceable to the sources listed; where a claim could not be verified it was left out. Links accessed 12 September 2026.
Need a Galveston pro to look at your wall? Call (832) 852-0497 for a free, no-obligation quote from a pre-vetted local seawall contractor.